Before you start writing it is best if you modify the styles into Hanken’s standardized format. Words standardsettings are not the settings you should use when you are writing a academic paper in Hanken. When you have modified all the styles to the appropriate settings you can simply choose the correct style without having to do them manually every time you write a paper. If you do feel like doing it manually you can by all means change do that but that takes only unnecessary time. That is why these instructions exist so that you may save time when writing academic assignments.
The correct styles are in the chart below:
+ = Create New style. * = Visible only after a function is used.
Style Chart:
| Title of the Work | Georgia 19 | (Centered) |
| Author | Georgia 16 + | (Centered) |
|
Department Hanken School of Economics Location Year |
Georgia 12 + | (Centrerad) |
| HEADING 1 | Georgia 13 | Bold, ALL CAPS (See below) |
| Heading 2 | Georgia 11 | Bold (See below) |
| Heading 3 | Georgia 11 | Bold, Italic (See below) |
| Heading 4 | Georgia 11 | Italic (See below) |
| normal (body text) | Georgia 11 | Normal text (See below) |
| Appendices (Insert Caption) | Georgia 13 +* | Bold (See more on own page) |
| Tables/Figures (Insert Caption) | Georgia 9* | Bold (See more on own page) |
| Citation | Georgia 9 + | Indented text (See below) |
| Footnote | Georgia 10 + | Single spacing; Spacing Before & After 0 pt |
| TOC HEADING (Table of Contents) | Georgia 13 * | Bold, ALL CAPS (See more on own page) |
| TOC 1 (Table of Contents) | Georgia 11 * | ALL CAPS (See more on own page) |
| TOC 2-4 (Table of Contents) | Georgia 11 * | (See more on own page) |
| Reference List text | Georgia 11 + | Single spacing (See below) |
| Page Number | Top of page | Center (See more on own page) |
| Marginals | Top: 2,54cm Bottom: 2,54cm | Left: 2,54cm Right: 2,54cm |
| Header & Footer | Header from Top: 1,25cm | Footer from Bottom: 1,25cm |
| Line and paragraph spacing | 1,5 | |
| Page Size | A4 | |
| Font Color | Black |
Mac users:
These instructions are made on Windows Word 2016 but you can do the same things on Mac computers even if the “Modify” window looks different. Choose “Add to template” so that it will be saved on the word program. Follow the instructions on this page and you should arrive at the same end result. Choose also “New documents based on this template” so that whatever changes you have made will be saved in future Word documents!
Modify Styles
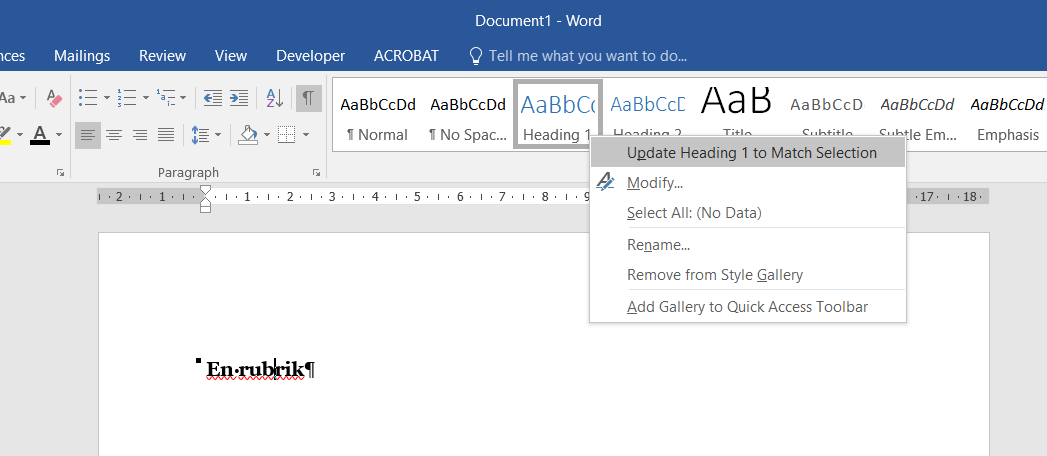
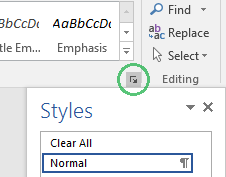
Start with “Home” and seek the “Styles” field. Right click on a style in the field and choose “Modify” for the style you want to change:
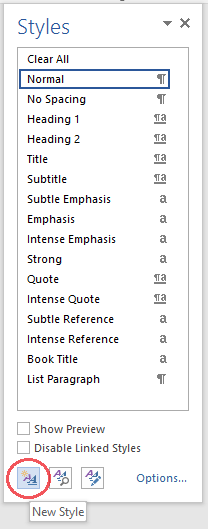
You can also make all styles visible by clicking on the right hand corner on the style field:
The necessary styles are already available in Word such as Heading 1, Title etc. but if there is not a style available that you need you can create it through “New style”. Create those styles you need from the Style Chart above.
Normal text
It is recommended that you start by modifying the Normal style since it is the one you will use the most and all other styles are based on it. Choose “Modify Style” for Normal and change the settings according to the style chart:

Normal should also be justified in its margins:
Choose also “New documents based on this template” so that the settings are saved to the next document (Use this for all styles!):

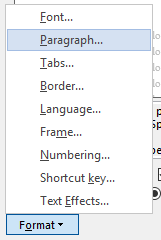
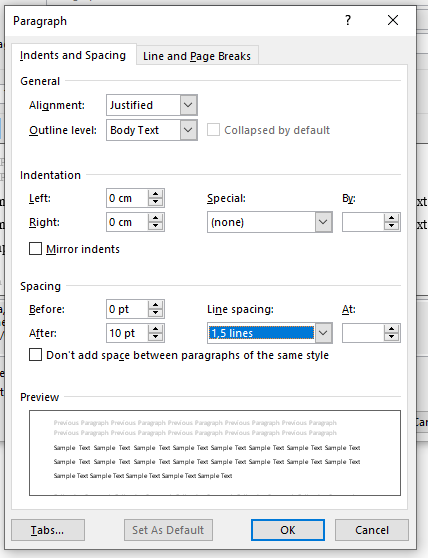
To get correct line spacing choose “Format”>”Paragraph”:
Choose 1,5 as the space between the text. Line spacing should be 1,5 for all other styles as long as you have chosen to based them on “Normal“. Also the normal style should have Spacing: After 10 pt.
All styles besides “Normal” can be changed on what kind of style the are based on. Alter the “Style based on” field to either to “no style” or “Normal”.

Observe! If you make changes on the “Normal” style after you have modified it the first time will all the changes you make to the style affect also all styles that are based on it!
Main Headline (Heading 1)
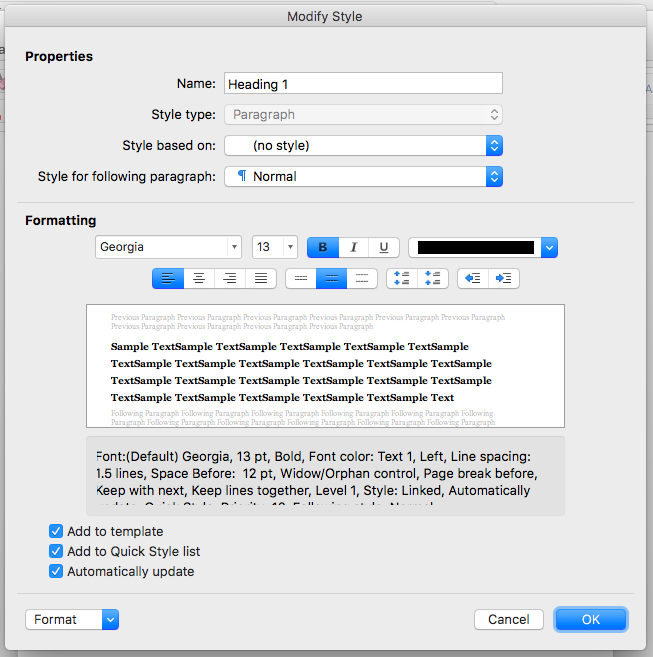
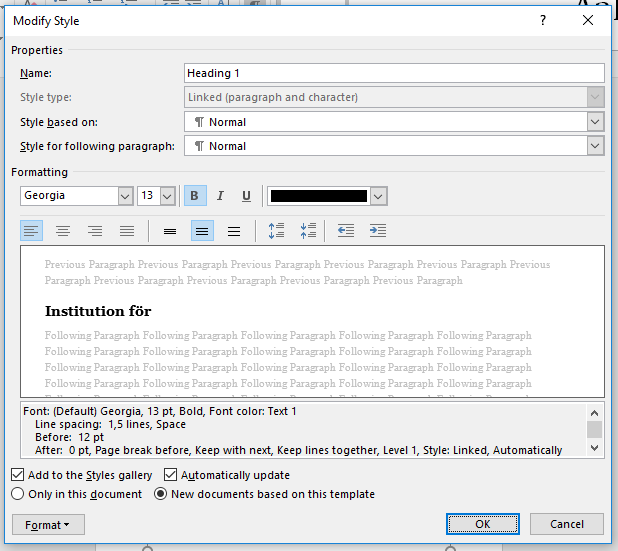
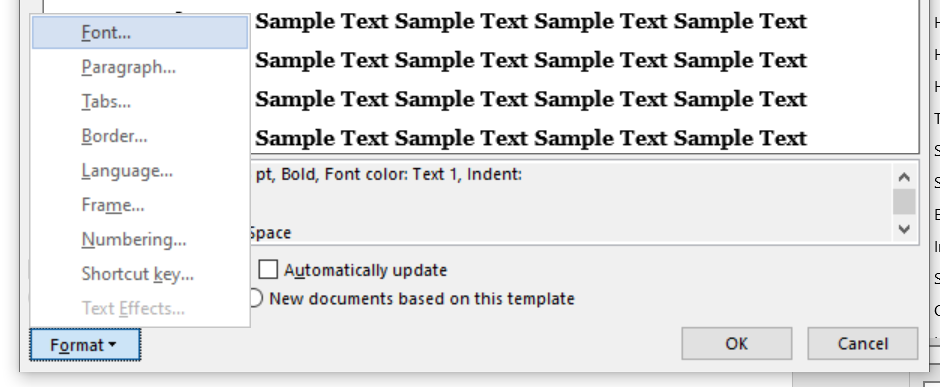
We will use Heading 1 as an example on how to modify a style. Even if these instructions are specific for the formatting of style Heading 1 you can use apply these same instructions for all the other styles you will need in writing you texts. However, be aware that the other styles should not have the same format and functions as Heading 1! Choose “Modify Style” for Heading 1:
It is important that you format all respective styles according to the style chart above.

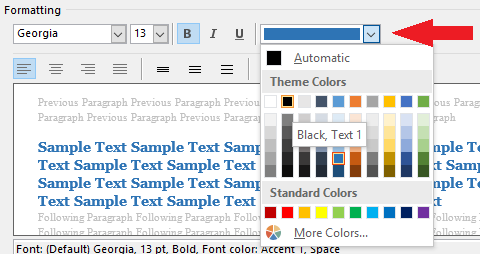
If the font color is something other than black it can be changed through the following box:
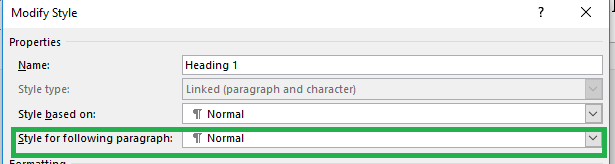
The important thing with Heading 1 and all other headlines (Headings) that all styles that comes after it should be normal text. This means that when you press enter ↵ (next paragraph) the text after the headline is normal text. What the style that comes after the paragraph is put in the “Style for following paragraph” box.
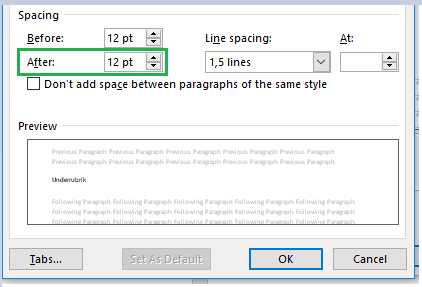
The line spacing should also be like the other styles be 1,5 lines. Put also the spacing after Heading 1 should be 12 pt:
There is no need to modify the before and after Spacing for most other styles besides the default settings that are already there in Word. Line Spacing should be 1,5 for all styles.
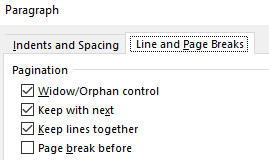
However, Heading 1 should have a automatic page break which no other style has! To use this setting go to “Format>”Paragraph”>”Line and Page Breaks”>”Page break before”:


If some reason another style has this automatic page break in use it can be removed by following these instructions.
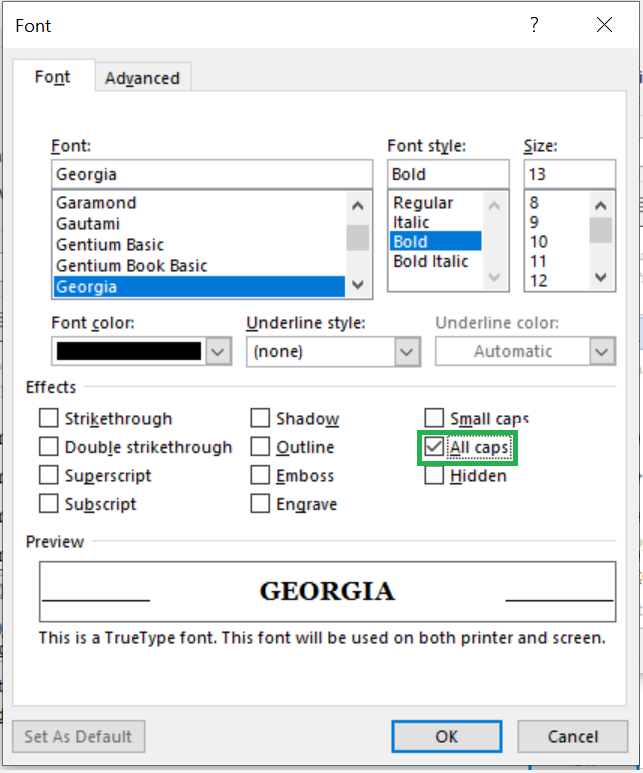
Heading 1 should also written in big letters which can be used automatically by activating ”Format”>”Font”>” ALL CAPS”.
Have also the following settings chosen if they already are not when you accept the changes (use these for all styles!):

Other Headlines (Heading 2, 3, 4)
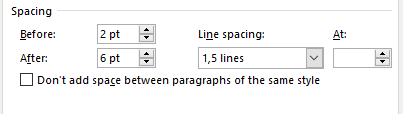
The other Headlines meaning Heading 2, 3, and 4 have all their own style with bold and italic. The only thing they have common is that they do not have Page Break Before in Paragraf > Line and Page Breaks and Line Spacing is 2 pt before and 6 pt after.
Citation
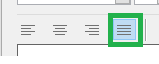
The Citation style (which must be created through “New style”) should have a automatic indented text. Click once on the marked icon to get indented text:
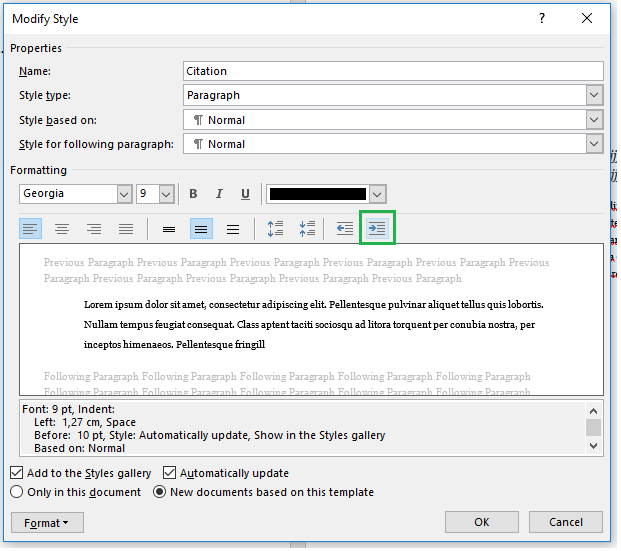
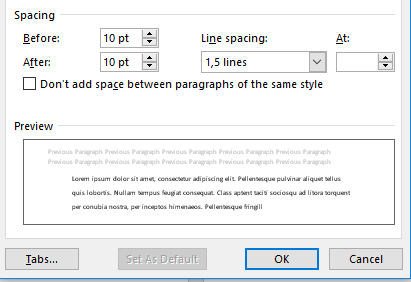
Every time you choose the Citation style the text will be indented. Change also the Spacing for the style Before: 10 pt and After: 10 pt:
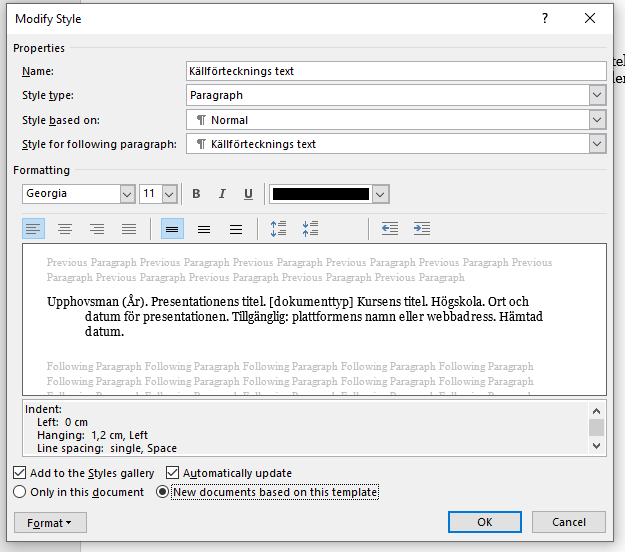
Reference List text
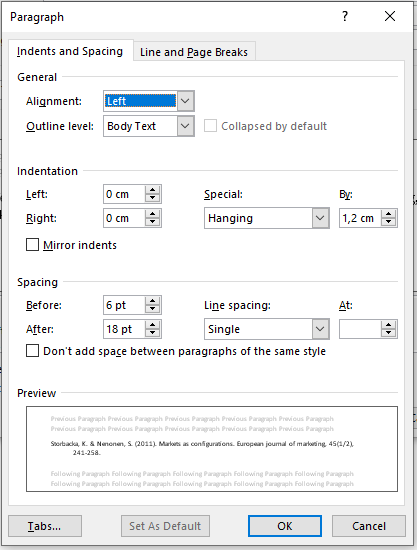
The text in the reference list has its own format. Create the reference list text as a “New style”. The font is Georgia 11 with Align Left. Different from other styles the text should have single line spacing and the space before the text should be 6 pt and 18 pt after the text. The reason for the spacing is so that you only need to change the row once to get a correct looking reference list. In the paragraph window in Identation – Special – Hanging should have 1,2 cm. This means that the next line in the reference will have an automatic indentation.